FREQUENTLY ASKED QUESTIONS
ANSWERS TO SOME COMMON QUESTIONS
We've compiled some of the most common questions we get. Don't see your question? Ask Our Specialists or Contact Us. We're here to help! Click on a topic below to jump to the section.
ABRASIVES
Short answer – SAFETY FIRST, ALWAYS USE A GUARD! OSHA requirements are that a tool be guarded anytime you are using a cutting wheel or a flap disc. You are not required to use a guard on a tool less than 55mm (roughly 2.3”) diameter. Abrasives that need a guard should include a regular hard grinding wheel.
NO – there is a more enclosed style for cut-off wheels than for coated abrasives.
Most coated abrasive manufacturers will warranty their product for 12 months past the manufacture date. Coated abrasives will see regression in belt splice, resulting in splice popping. This is especially prevalent in narrow belts (1/4-1/2”) due to limited area of adhesive.
Bonded abrasives will have a date stamped on the metal band in the center. It will have a year and a Vxx code, which will correspond with end of quarter with listed year. (For example, V01 is quarter one). Bonded abrasives can become brittle and break during use, potentially causing injury. Heat and humidity both play into this. Excessive heat will shorten shelf life. The best plan is to store at room temperature.
ADVANCED CNC/PLASMA CUTTING SYSTEMS
Whether you are purchasing a base or high-end CNC cutting machine/table, these are the factors that must be considered regardless of which manufacturer you decide on.
- Type of Projects you’re going to use it on (including material, degree of precision needed, etc.)
- Amount of Space you have
- Full Cost of Machine, including initial price, service and replacement part costs
- How Easy or Hard it is to use
- Level of Support provided by brand and supplier
- Reputation and Reliability of the machine and manufacturer
Contact Us with questions you may have about your equipment options.
Additional considerations:
- Power is needed to run the computer, control system and table drive system and power the plasma cutter. So making sure you have the right amperage and breaker requirements is critical. Plasma tables usually only require 120v connections; most plasma cutters a minimum of 240v Single Phase; larger industrial and high definition plasma units 3 phase power.
- Output Power, Cutting Speed, Duty Cycle, Torch Selection are all key to performance, and will vary based on the cutting you're planning on doing.
- Consumables for a Plasma Cutter, cutting tips and electrodes in particular, will be an ongoing cost so learn as much as you can about how fast your machine will use these items.
Contact Us with questions you may have about your equipment options.
No matter the size or cost, all tables have these basic components:
- CNC plasma table and mechanical components – This includes a gantry, torch carriage, and z-axis to move the torches.
- CNC – A CNC will convert your cutting program into instructions that control cutting direction and speed, along with your plasma system, height controller, and peripheral equipment.
- Fume control – Controlling fumes and smoke is absolutely necessary! To do so, you have two choices: a downdraft system or water tray. Read more about fume control
- Plasma cutter – Does the actual cutting of the metal, using electricity to generate the plasma arc. Most often classified by amps. Common ratings are 45, 65, 85, etc. Critical to the quality of cuts, so important not to skimp on this item.
- Torch height control (THC) – THC is critical, will dramatically improve cut quality along with torch and consumable life, saving you money in the long run.
Contact Us with questions you may have about your equipment options. We can offer training, technical support, and after-sales service and support.
The size will vary based on the size of the material/project you'll be using in for.
The cutting process used is a main factor in determining the thickness of the material that can be cut. The manufacturer of the plasma cutting machine can help determine this accurately.
Oxyfuel Cutting heats metal to ignition temperature using an oxygen and fuel gas flame. A chemical reaction between the oxygen and carbon steel creates iron oxide, referred to as slag, which is blown out of the gap by the high pressure of the gases used. Fuel gases used include: propane, propylene, natural gas, and acetylene.
It is only suitable for cutting ferrous materials (not effective on aluminum or stainless steel), and typically only used to cut thicker materials because other methods (namely plasma) are faster on thinner materials
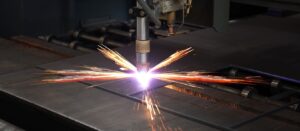
Plasma Cutting uses a high-temperature, electrically conductive gas to cut through any material that can conduct electricity. It can be used for both ferrous and non-ferrous materials, and works on rusted, painted or grated materials because of its smaller heat-affect zone. Most commonly used to cut metal between gauge and 2 inches in thickness. However, newer systems can pierce or sever greater thicknesses.
Plasma cuts faster and does not require a pre-heat cycle.
Laser cutting uses a computer-directed beam of light combined with oxygen, nitrogen and compressed air to vaporize material. It is highly accurate, making it perfect for thinner sheet metals with tight tolerance specs or precise cuts. It also produces superior edge quality for very square cuts. It can cause heat distortion, especially on thicker plates.
By comparison, plasma cutting blows inert gas out of a nozzle which an electrical arc is passed through—changing the gas to plasma. The plasma is hot enough to melt the metal which is then blown away from the cut. Plasma cutting is better for simpler cuts, thicker materials, and materials that are highly reflective.
Both laser and plasma are able to provide high-quality, accurate cuts, and can leave dross and pierce spatter—though plasma more so.
The method you choose must be evaluated carefully and discussed with your supplier.
BEVERAGE CARBONATION TIPS & TROUBLESHOOTING
It will vary slightly depending on whether you have a Bulk CO2 tank or EZ-Fill tanks. Go to our trouble shooting page for diagrams and instructions. The full URL for that page is: https://centralmcgowan.com/beverage-co2/beverage-carbonation-perfected/beverage-system-troubleshooting/.
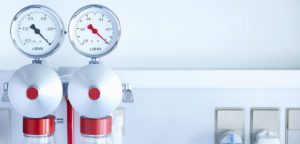
Your regulator, which is the component that connects the tank to the air hose, will have either one or two gauges on it.
If it only has one, then that’s the one you’re looking for. If it has two, look for the gauge that shows a range of about 0-60 PSI (pounds per square inch). This will be your regulated pressure gauge. The number the arrow is pointing to on this gauge is how much pressure is being delivered to your keg.
This is why it is worth considering a double gauge regulator.
A double gauge regulator has a regulated pressure gauge as well as a high pressure gauge, which measures the amount of CO2 left in your cylinder. Without a double gauge regulator, it is a bit of a guessing game.
Rather than waiting till you completely run out, it is good to know how many kegs can be dispensed per CO2 tank to know when the best time to refill is.
Most American breweries advise for a CO2 pressure between 12-14 PSI. The brewery or distributor you received your keg from should have a pressure recommendation, and if you receive your keg from a third party, it’s best to call the brewery and ask.
An inaccurate pressure can result in either under or over carbonation, which translates to either flat beer or an overly foamy beer.
- Check if there is ice in the ice well and are the cold plates exposed?
- Is the carbonator running?
- Do you have CO2 in your cylinders or bulk tank?
It is likely due to over carbonation.
- Is your beer temperature too warm?
- Check the gas pressure on the keg to be sure the pressure is correct.
- Do you have the correct blend of CO2 and nitrogen? 75/25 or 60/40 mix?
- Is there a leak in the beer lines?
It is likely due to under carbonation.
- Is your beer temperature is too cold?
- Is the gas pressure on the keg correct?
- Do you have the correct blend of CO2 and nitrogen? 75/25 or 60/40 mix?
CHECK ALL 3 GAUGES. Refer to the content gauge on the tank. Green is full and red is empty or Full, ¾, ½ and ¼.
There is a vessel pressure and supply gauges to help determine what’s going on with the tank. If the supply gauge reads less than 90 and/or the pressure gauge reads less than 100, then there is not enough pressure to push the CO2. Please call Central McGowan to service your tank.
Check your Bag-In-Box Syrup (BIBS). If the box is empty it will continue to use CO2. Please keep in mind when changing to a new BIBS, clean the fitting thoroughly with warm water to remove any build-up.
Check for any downstream leaks that feeds your fountain machine, draught beer, juices, etc. Please contact your local dispenser service agent for assistance.
This occurs when there is a high CO2 usage or during peak times during the day. This is normal. However, if the frost remains and does not melt, there could be a leak in the beverage system.
- Check your Bag-In-Box Syrup to see if it’s empty.
- Check your pressure regulator as it could be faulty.
If there is frost in the early morning after opening, during a slow period, or continuous ice formation on one side of the tank near the bottom, this could indicate a leak in the system. Please contact Central McGowan CO2 for assistance.
The tank may just be venting pressure which is normal. However, here are a few things you should do.
-
Check the large brass barrel located on top of the tank. Read the gauge that shows 0-400 psi. Normal operation should read 280 psi or higher. The tank is venting pressure, this is normal. If the reading is below 280 psi, please call Central McGowan CO2 to service your tank.
-
If the hissing sound is NOT coming from the area noted above then follow the CO2 lines to your fountain and/or draught systems. If there is any type of leak down stream then please contact your local dispenser service agent for assistance.
-
If you see “fog” coming off the tank or any lines, stay clear of the area, ventilate to reduce the amount of CO2 in the space and immediately call Central McGowan CO2 to service the tank.
- Is the carbonator plugged in for power? If yes, then gently shake the carbonator which should start the cycle to turn on/off.
- Try running the soda water tab from your fountain machine or bar gun for 2 minutes. This will start the cycle to turn on the carbonator. If this does not work then please call your local dispenser agent for assistance.
DRY ICE
Dry ice is the common name for the solid form of CO2. It's called dry ice because it sublimates instead of melting, which means it goes from a solid directly to a gaseous state. It’s made by compressing and cooling CO2 until it liquifies. Once it liquifies, the pressure is reduced which causes some of the CO2 to vaporize resulting in a drastic drop in temperature. This causes the liquid to freeze, creating CO2 “snow” (CO2 freezes at -109.3°F or -78.5° C). The “snow” is then hydraulically pressed into dry ice blocks, or formed into nuggets and rice by extruding it through special dies.
No. Dry ice is extremely cold -109.3°F (-78.5°C) and should not be touched with unprotected skin as this could cause freeze burns or even frostbite.
It should be kept and stored in well-ventilated areas and containers that are not air-tight. It must be kept out of the reach of children and animals.
DOWNLOAD our Dry Ice Safety Sheet
Dry ice should never be ingested or used in drinks or beverages, and kept out of the reach of children and animals.
Depending on weather and type of dry ice and container, dry ice sublimates about 2% to 10% per day. Keep dry ice in a high-quality insulated container. The thicker the insulation, the slower dry ice will sublimate (process of changing from a solid directly to a gas).
ColdZERO, our brand of dry ice, is available by order for large customers and for pickup by the public at Central McGowan’s three retail stores. NOTE: our dry ice is produced in St. Cloud and not stocked at other locations so it must be pre-ordered for pick-up at locations outside of St. Cloud.
ColdZERO comes in:
- Large Blocks, Slabs & Slices
- Small Compressed Blocks (approx.. 14 lbs., 5 ½” x 5 ½” x 10”) & Half Blocks (approx.. 7 lbs., 2 ¼” x 2 ¼” x 10”)
- Nuggets (approx. ¾-inch pieces)
- Rice (approx. 1/8-inch pellets)
FOR LARGER ORDERS, Central McGowan offers same-day, convenient delivery and pickup which are sold in returnable, rolling insulated totes. Products are volume-priced, so the more customers buy the better the price. Totes are lined with plastic to ensure purity and hold about 500 lbs.
FOR CONSUMERS, ColdZERO can be purchased by the pound from any of the company's retail stores for $1.50/lb. Product is packaged in brown paper, double-walled dry ice bags. Reusable, dry ice cooler bags can also be purchased for transport.
Dry ice is used in more than 20 different industries and hundreds of applications, including everything from industrial cleaning and dry ice blasting to medical manufacturing to food processing and equipment cleaning to things like wood finishing, mold remediation and historic restoration. Plus, it works for preserving food, fish and game and providing emergency refrigeration during power outages.
Dry ice sublimates which means it changes directly from a solid to a gas—so there's no secondary waste, residue or watery mess left behind.
LASER WELDING & CLEANING
No, for the most part. Welding is an inherently dangerous task—regardless of the type. The fact part of this statement is LightWELD uses 1064 nanometer (infrared) wavelength for the welding process which creates invisible, very intense, focused heat—much hotter than traditional welding processes. However, IPG’s Lightweld multiple built-in safeguards prevent dangerous or errant laser emissions. For example:
- The unit will only fire when in contact with a conductive metal surface and shuts off immediately after breaking contact with surface.
- The high focus energy of laser results in nearly zero sparks or spatter, a common cause of burns in MIG welding.
- The highly focused beam also allows for faster travel, which means less heat input into part. Depending on part size, the part may be able to be handled without PPE immediately after welding with laser. MIG and TIG parts require much more energy, causing residual heat buildup on parts and slower downstream processing of parts or possibility of injury due to handling burns.
No. Laser welders to not interfere with other equipment. High frequency is a process used to give a “hot start” on TIG, and is part of flowing electrons. Laser welders by comparison "push" photons, so no “high frequency” actually exists to cause any interference.
No. Laser welders to not interfere with pacemakers, according to IPG Photonics, the leading developer and manufacturer of high-performance fiber lasers and amplifiers for diverse applications and maker of LightWELD laser welders/cleaners. LightWELD products are required to have radiated emission limits below the Class B limits specified in CISPR 11—levels which have proven to pose no issues with pacemakers.
CISPR 11 is a widely used international standard for electromagnetic compatibility within Europe for electromagnetic emissions. It applies to a very wide variety of equipment including everything from Wi-Fi systems, and microwaves through to arc welders.
More specifically, LightWELD products do not use an electrical arc to generate the localized heating for welding materials. Instead, they use laser light which does not create the electric and magnetic fields that are associated with arc welders.
Do keep in mind that many places LightWELD products are used may have other welding equipment like arc welders and resistance welders. The user should consult their physician before working in an industrial environment.
LightWELD is up to four times faster than traditional welding methods for these reasons: travel speed is up to four times faster than traditional methods, fixturing is simpler or not necessary, and post-weld grinding or sanding is not needed or significantly reduced – all of which increases productivity while minimizing rework.
Compared with MIG and TIG welding, either of which can take a lifetime to master, LightWELD is quick to learn, allowing new users to make high-quality welds in just a few hours.
LightWELD comes preloaded with optimized welding parameters for the most common materials and thicknesses. You can adjust the power up or down to match your travel speed and desired penetration, and you can save those settings and recall them as needed.
Yes, you can easily weld dissimilar metals like copper to stainless steel or to aluminum, plus parts with different thicknesses across all weld joint types: tee, butt, corner, lap and edge.
For stainless steel, galvanized steel, mild steel and aluminum, you can weld single-sided up to 4 mm and double-sided up to 10 mm – copper single-sided up to 1 mm and double-sided up to 2 mm.
LightWELD excels at both vertical and upside down welding since there are normally no consumables and minimal spatter produced, making it safe and easy to weld in any position.
LightWELD offers five modes of operation to match your needs:
- Continuous wave - the laser is on constantly for maximum penetration and travel speed
- Pulsed mode – laser pulses producing less energy for slower welding with less heat input
- Tack mode – to create identical tack welds
- Stitch mode – used for repeated tacking or overlap welds
- High peak power mode – short bursts of high power used to penetrate reflective metals
The duty cycle is defined as the percentage of time that a machine will safely operate or weld, within a certain time period, at a given amperage. The LightWELD runs at 100% duty cycle at the maximum 1500 watts of laser power.
Wobble welding oscillates the beam back-and-forth at various frequencies to produces wider seams and more aesthetic welds. It is also helpful for parts with poor fit-up. LightWELDcomes with optimized, preprogrammed wobble parameters and allows on-the-fly control of up to 5 mm of wobble welding at adjustable frequencies up to 300 Hz.
LightWELD is a Class IV laser, which means special containment is needed for safety of those not directly involved with laser welding process and not wearing the required PPE, specifically infrared filter safety glasses. Light containment uses non-light permeable material that will also absorb stray laser without igniting. Options include:
- Class IV Curtains are made of a heavy fabric that is rated for exposures of 300 WATTS at 1 inch for 90 seconds without igniting. Curtains can be hung with frames or track mounted on the floor, wall or ceiling. Ceiling mounts can be direct or suspended to work around sprinkler systems or other structures.
- Prefabricated Enclosures are modular systems with metal components, usually black or gray in color. Configurations vary based on physical layouts and functional needs.
Contact us for more information. Visit our Ask Our Specialists page.
PROPANE
Propane cylinders can last for decades with regular inspections and maintenance. They do have expiration dates (you can usually find the expiration date at the top of your tank). All propane cylinders must be inspected and re-certified 5 to 12 years after their date of manufacture, then every 5 years after that. When you exchange your propane tank at a certified Central McGowan retail branch, you can be sure that the tank you're getting has already been recertified.
Propane doesn’t smell like anything – at least not in its original state. Propane manufacturers purposefully add an odorant called Ethyl Mercaptan which smells like sulfur (rotten eggs) to alert users of the presence of a potential propane leak, and make it much easier to detect.
Most 20-pound propane cylinders don’t have a gauge. Here are three ways you can determine how much gas you have left.
- Use the warm water method as shown on the FiX IT Home Improvement Channel. Fill a small bucket with warm to hot tap water. Pour the water down the side of the tank. Run your hand along the side of the tank and feel for a cool spot. The top of the cool spot is the fill level of the tank (it’s cool because liquid propane inside the tank absorbs heat from the water, which makes the metal wall of the tank cool to the touch). While not 100 percent accurate, it can give you a rough estimate how much gas is left.
- Weigh the tank.Most propane grill tanks come with two numbers stamped on the handle – the water capacity (“WC”) and tare weight (“TW” which is the weight of the tank when it’s empty). Most grilling tanks weigh about 17 pounds when empty and hold about 17.5 pounds of gas. To measure how many pounds of propane are left in your tank, simply weigh it on a scale and subtract the TW number.
- Install an external gauge.External propane tank gauge options include in-line pressure gauges, analog propane scales and digital propane tank scales.
As a rule of thumb, one 20-lb. cylinder of propane will typically last between 18-20 hours if you’re grilling on a medium-sized grill. Larger grills can burn through a 20-lb. cylinder of propane in as little as 10 hours.
Transporting propane cylinders is safe as long as you follow these simple rules.
- Even if your cylinder is empty, always turn off the valve and securely close it.
- Keep cylinders upright at all times. Make sure they stand vertically and firmly secured so they don’t roll over on their side or shift position. A bungee cord or rope can help keep your cylinders in place.
- Place the cylinder in a well-ventilated area of your vehicle and never leave a full propane cylinder in a hot car since propane expands with heat which may lead to a gas leak or explosion. If you’re running multiple errands, drop your cylinder off FIRST.
Propane cylinders are designed to minimize the risk of explosion or rupture: not only do they have a built in safety valve, they are also only filled to 80 percent of their volume capacity to allow for propane gas expansion as ambient temperatures rise. The bottom line: it is extremely difficult to bring a propane tank to the point of explosion. However, you should try to keep it out of the hot sun and not leave a cylinder inside a hot car.
There are many locations that provide propane. Be sure to visit an authorized propane retailer to have a trained professional assist you. A propane cylinder should have an overfill protection device which prevents exceeding the maximum permitted fill limit. An overfilled tank may not allow for any propane expansion which could lead to uncontrolled release of propane. When refilling, make sure the propane cylinder hasn’t been damaged in any way. This includes dents, bulges, cracks, burns, excessive rust or pitting. Your Central McGowan customer service rep can assist you with questions as well as tips on properly disposing of damaged cylinders.
Propane cylinders can be stored safely as long as you follow these simple guidelines.
- Always select an outdoor space on a level and preferably non-combustible surface.
- Never keep propane cylinders indoors or in an enclosed area like basement, shed or garage.
- Choose a cool place away from any source of ignitions such as flames, flammable or combustible material; and never expose propane cylinders to heat above 120 degrees F. It’s also a good idea to keep them stored away from high-traffic areas where they can be bumped, damaged and/or topple over.
- Store propane tanks in a cooler place, out of direct sunlight. Don’t let tanks heat to over 120° F. This may cause a leak or even combustion.
- Store propane tank outdoors—never indoors in the garage, basement, carport, shed or porch.
- Keep propane tanks away from flames and spark-producing tools. Do not store your backup tank for grilling near the grill.
- Store propane tanks upright not on their sides because that can result in the release of liquid and vapors.
- Store tanks on a dry, level surface—not on wet ground or other wet surfaces as this could lead to rusting and pitting and compromise the integrity and safety of your tank.
- Inspect your tank regularly and replace if damaged. Don’t use one with visible signs of damage.
- Never leave your propane tank in a closed vehicle, so no running other errands while exchanging or refilling your propane tank.
- Have your propane tanked professionally filled by a qualified propane distributor.
- Don’t refill outdate tanks with expired certification. It’s against the law. Propane cylinders must be recertified 12 years after their date of manufacture and every 5 years after that.
Propane is odorless. But propane manufacturers purposefully add an odorant called Ethyl Mercaptan which smells like sulfur (aka rotten eggs) to alert users of the presence of a potential propane leak. If you smell that distinct sulfur smell or hear a hissing noise near your cylinder, shut the valve (if safe to do so), leave the area.
- Never start your grill or propane appliance if you suspect a leak.
- Always check for leaks before using a propane cylinder if it hasn’t been used in a while. It’s easy to do this by applying a soapy water solution to the connector valve and outlet. Open the cylinder valve, and if bubbles form, close the valve and tighten the connection. Wait a minute, then slowly open the valve once again. If bubbles continue to form. Don’t use the cylinder. Bring to a Central McGowan retail branch to be exchanged.
Near the handle, you’ll find several stamped markings. These provide important information about your tank’s origination and capacity rating. A date should appear on the handle, near the valve indicating the manufacture date. It most often reads in a standard Month-Year format.
Each tank also comes stamped with a unique identification number, like those stamped onto vehicles. This helps the U.S. DOT and propane dealers track and keep safety records for each tank in circulation.
A propane tank’s recertification date is most often indicated by the letters A, B, C, and D which correspond to the 1st, 2nd, 3rd, and 4th quarter of the calendar year, respectively and are followed by the last two numbers of the year recertified. Of course, if you notice evidence of damage or excessive wear, such as dents, bulges, or cracks, or if you notice the valve isn’t working correctly, return it to us or an authorized propane distributor for inspection.
If your propane tank is expired, exchange it for a new one the next time you need gas. Central McGowan takes care of qualifications for you. Otherwise, you'll need to find a qualified service technician trained to properly inspect and qualify a tank.
Yes! Even in the Midwest, winter doesn’t have to be a dark time for the BBQ enthusiast. You can be a winter grilling warrior and keep the ‘Q going all winter long by following a few winter grilling basics. DOWNLOAD our winter grilling tip sheet now, or keep reading.
- COVER your grill - This makes it much easier to clean off after a heavy snow.
- Do your PREP work - Keep your outside time and your propane usage to a minimum by getting everything you need together before starting the grill. This includes tongs, brushes, meat thermometer, sauces or seasonings, and trays to bring the food out to the grill and back inside.
- Make sure you’ve got plenty of GAS – Your propane BBQ grill will use more propane than in the summer to keep the grill hot enough to grill your food. It will also take around 10 minutes longer to warm up. Keep a spare propane cylinder on hand to prevent a runout.
- Location, Location, LOCATION - Winter winds can make grilling difficult, both in terms of comfort and keeping the flame on. Put it in a spot where it will be blocked from the wind as much as possible, and make sure it’s perpendicular to the wind to prevent the flame being blown out. Also, make sure the area is well lit and the grill is a safe distance from the house to prevent a fire and protect your siding.
- LIGHT it up – It gets darker earlier, so be sure you’ve got adequate lighting to operate your grill and monitor your food that’s cooking. Invest in a grill light if you don’t.
- Make it FAST - This isn’t the time for low-and-slow indirect grilling like pulled pork or brisket. Grill quick meals like kebabs, chicken breasts, fish, steaks, and pork tenderloin. Also, keep the lid of your grill down as much as possible. The grill loses heat each time you open the lid, which lengthens cooking time and makes you use more.
- Be SAFE - Check the path to your grill and clear any ice or snow to prevent falls. Don’t wear a scarf or other winter outerwear that can dangle over the flame and catch fire. Be extra careful of flame near your coat. NEVER use your grill in an enclosed or covered area this can create a dangerous buildup of carbon monoxide.
WELDING
Welders come in a wide variety of sizes and ranges. There are many types of welding processes suitable for many different types of applications, including:
-
- MIG / Gas Metal Arc Welding (GMAW)
- TIG / Gas Tungsten Arc Welding (GTAW)
- Stick Welding
- Flux-Cored Welding
For a first time buyer, it can be confusing to know which welder to buy. You need to gain a good understanding of the types of welders available, how each performs, and the amount of welding skill required to operate each. It's important that you match your needs and welding skills with a process before you begin to consider specific welder model options.
Here are four key questions to ask:
1) What Is your Primary Welding Application Going to be? Is it generally going to be used as a repair tool? In a small business or hobby? For small, important, tight-tolerance or aluminum items?
2) What is your Budget? While you are likely to have a price in mind when you are purchasing your first welder, it is important to consider all the factors. Don’t forget to calculate the cost of accessories and consumables that you will need to operate your welder. And make sure you get the appropriate personal protective equipment. A good helmet, nice gloves, a protective welding jacket and welding cap are money well spent.
3) What Materials will you be Welding? What you'll be welding is a big determining factor in choosing a welder.
4) How Important is Ease of Use? MIG welding is the easiest process to learn but may not be best suited to your application.
The key to success is picking the machine that is best suited for the functions you are going to be doing. If you are planning on welding thicker material, select a welder that has more power and amperage. Once you've purchased the right welder, then it’s all about practice.
Still Unsure?
Check out these resources from some of the brands of welders we carry OR contact us at 320-257-4800 or 800-569-1322 (option #1), and one of our skilled customer representatives can help you.
Following are a few welding resources recommended by our team. There likely are more but these are the ones we like.
Here are some training resources provided by some of the major brands we carry.
TRAINING
VIDEOS ON YOUTUBE

